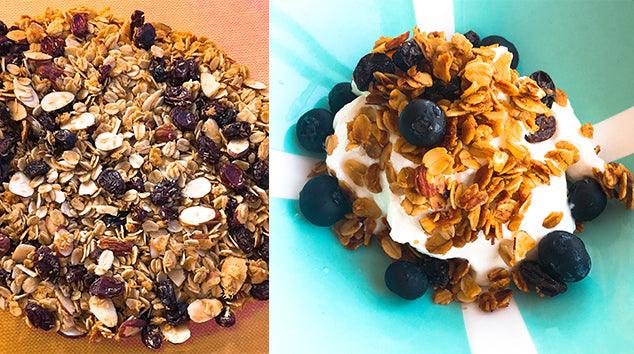
I never knew how easy it was to make homemade gluten-free, vegan granola until recently, and now it’s a staple in my home! Granola adds a great layer of texture to parfaits, frozen yogurt or even as part of a trail mix. However, some store-bought brands are laden with added sugar. This homemade vegan granola is packed with heart-healthy, certified gluten-free oats and only sweetened with maple syrup. It is customizable to your own taste preferences.
I've been experimenting with cooking temps and times for the perfect granola for a while and finally found it! This recipe is adapted from Alton Brown's granola recipe. It is literally the best cooking temps. This recipe makes a large amount of granola, which can be stored in an airtight container or portioned out in individual resealable bags. Although homemade granola can last for a few weeks, freezing it can extend the shelf life. It's also a great recipe to put in mason jars and give as little gifts for the holidays!
This recipe was so easy to make that my 2 year old did most of the work! So be sure to get your kids involved in this one. If you're concerned about clean-up, try doing the prep over a piece of parchment paper lined on the kitchen counter or table and use a large cup to place all dirty utensils in. Super easy clean-up!
Ingredients:
- 3 cups certified gluten-free rolled oats
- 3/4 cup unsweetened shredded coconut (depending on how coconutty you like it)
- 3/4 cup sliced almonds
- 1/3 cup pure maple syrup
- 1/4 cup coconut oil
- 1 1/2 teaspoons vanilla extract
- 1 cup raisins
Directions:
- Preheat oven to 250 degrees F.
- In a large bowl, combine the oats, nuts and coconut.
- In a separate bowl, combine maple syrup, oil, and vanilla.
- Add liquid to dry ingredients and mix well until oats are coated.
- Pour onto a parchment lined baking sheet.
- Bake for 1 hour and 15 minutes, stirring every 15 minutes to achieve an even color.
- Remove from oven and transfer into a large bowl. Add raisins and mix until evenly distributed. Allow to cool before storing.
- *Note: mixture may seem a bit wet upon taking it out of the oven but it will crisp up once it cools.

Leave a comment
This site is protected by hCaptcha and the hCaptcha Privacy Policy and Terms of Service apply.